Home Recording Studio Equipment: 7 Essentials To Get Started
Building a home recording studio can be an amazing experience. There’s nothing like having the ability to record your song ideas whenever you’re feeling creative. On the surface it might seem like a daunting task; however, the truth is that getting started with home recording doesn’t need to be so difficult or costly. When looking for home recording studio equipment there are 7 essentials that you need to get up and running. Inside of this article, I’ll outline exactly what you need and how to start without breaking the bank.
1. Computer
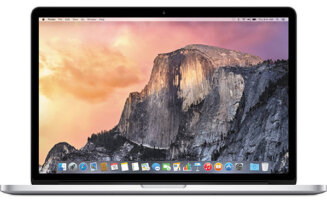
This may seem obvious to many, but long gone are the days of recording your songs to analog tape. Sure, analog studios do still exist; but these days, the majority of home recording studios are using computers.
Digital recording allows for a lot of flexibility in terms of inputs, outputs, and processing. Plus, it’s a heck of a lot cheaper!
That being said, the question becomes: “does it matter if you have a mac or pc?”
If you’re just getting started, it doesn’t matter. There are plenty of software options available for both.
2. Interface
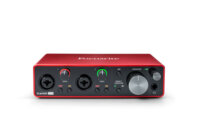
An audio interface is a device that allows you to get the sound of your microphones and instruments into your computer and into the software – where you’re going to record it.
So how do you go about picking the right interface for you?
There are five main criteria that I recommend you consider before buying an interface:
- How many instruments do you need to record at the same time? This will determine how many inputs you need on the interface.
- How many outputs do you need? For the majority of home-studio owners, two outputs is usually enough (to connect your left and right speakers). If you plan on using any sort of outboard gear for mixing (which isn’t very necessary with the quality of today’s audio plugins), you may want additional outputs.
- What are the inputs on your computer? Most audio interfaces come as either Thunderbolt, USB, or Firewire. Choose whichever will work with your system.
- How powerful is your computer? As you start to use more plugins within your mix sessions, you’re going to start to use up more of your computer’s resources. Some audio interfaces allow you to offset some of the plugin processing by processing it within the interface. If you have an older/slower system, you can purchase an interface that will help free up some of your computer’s resources.
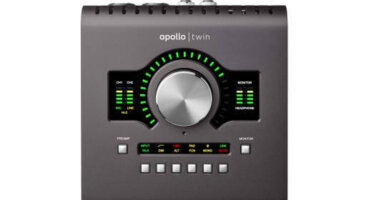
- Do you need a special interface to run the plugins that you want to use? The majority of audio plugins don’t require a special device in order to use them. Instead, they rely on your computer’s power to handle the processing. That being said, there are some premium plugins that DO require specific interfaces in order to use them. A great example of this would be with Universal Audio plugins. In order to use these, they require you to have specific interfaces or satellite cards which handle the processing power outside of your computer. For the majority of new studio owners, these premium plugins will not be necessary to get started; however, it is something to consider for the future.
Most sub-$1000 interfaces are pretty similar in quality. It’s only as you spend more money that you will get a higher quality interface with premium features. That being said, for the majority of home studio musicians, the different will be negligible.
Often the improvements you’ll find in a higher quality (and more expensive) interface have to do with preamps, digital-to-audio conversion, and connectivity to outboard gear.
Some relatively inexpensive interfaces that I’d recommend are the Focusrite Scarlett, Presonus Audiobox, or the Universal Audio Apollo Twin.

3. Software/DAW
So you have your computer and audio interface, but now what do you record into? This is where software comes in. When it comes to recording software, we refer to these programs as Digital Audio Workstations (DAW for short). These programs allow you to record audio into them, edit the audio, mix the files together, compose music, and so much more.
There are many different DAWs you can choose from. Some of the most popular include:
- Pro Tools
- Cubase
- Sonar
- Logic
- Presonus Studio One
- Ableton
- Garageband
- Reaper
Which DAW is the best to use?
Well, that’s a personal preference thing…On the surface they all allow you do perform the same basic functions. Where they differ is in things like visual layout, advanced editing functions, maximum track counts, stock plugin options, and a few other areas.
For the average home-studio musician who is just trying to quickly record ideas into their computer, programs like Garageband and Studio One are very intuitive and will definitely cover all of the basic necessities.
For more advanced mixing engineers, DAWs such as Pro Tools, Logic, and Cubase will offer more flexibility and editing features.
At the end of the day, there is no “best” DAW. It all comes down to your personal preference and the amount of advanced features you require for your workflow.
My advice is to choose one program and stick with it. The more you dive into learning the features of the software, the faster you will become with it. Many programs offer keyboard shortcuts (which allow you to perform certain tasks using a single key press on your keyboard). Once you learn and memorize these key commands, you will start to see massive improvements in the speed of your workflow within your DAW.

4. Speakers/Headphones
In order to hear the music you’re creating, you need to use speakers or headphones. Since you’re creating music for others to enjoy, it is important that you monitor your songs using studio-quality speakers or headphones. The reason for this is because studio-grade equipment has been designed for critical listening. As a result, it typically plays back audio with a flat frequency response.
On the other hand, consumer-grade speakers are usually built to sound more pleasing to the ear. Because of this, they usually have a hyped low or high frequency response. This may sound great for listening to music; however, when you are trying to make critical mixing decisions (with the intention of your audience listening to the song on a variety of different speakers), this “hyped” sound can be misleading and cause you to make mix moves that might not actually need to be done. For example, if you were listening to a song on headphones with lots of low end, you might think that you have too much low end in your mix – causing you to remove it from your song. Although this may now sound better on your headphones, it may make your song sound really thin on other headphones that don’t normally have the extra bass boost.
Which studio monitors are the best to buy?
It really depends on your budget. Some things to keep in mind as you buy speakers is that you’ll want to find speakers that have the widest frequency spectrum. Generally, speakers that have a smaller woofer in them (6″ or smaller) will typically have less low frequency response. Whereas, bigger speakers (eg. 8″ and bigger) will allow you to hear more of the lower frequencies.
My advice to you is to visit your local music store and bring some music that you’re very familiar with. Listen to those songs on a variety of speakers and pay attention to how each of the different models sound. Pick your favorite that fits your budget and that sounds the most natural.
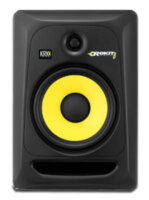
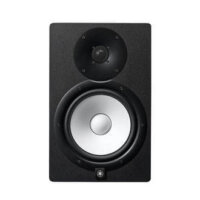
Personally, I’m a big fan of the KRK Rokit 8 and Yamaha HS8 speakers.
5. Microphones
Whether you’re recording vocals, drums, guitar amps, or the majority of live instruments, you will need at least one microphone.
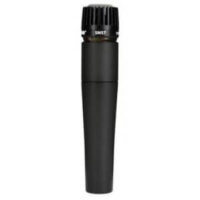
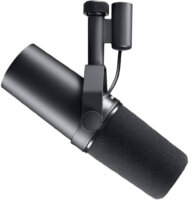
There are tons of microphone options available, ranging in price from $100 to $6000+. Is a $6000 mic always going to sound better? Nope. In fact, there are many classic, workhorse mics that can be found for under $300 (eg. Shure SM57, SM7B, Rode NT5).
There are many factors that can determine what sounds best:
- Some microphones have a little more brightness to them
- Some are a little warmer sounding.
- Some are better at picking up transient material (eg. drums)
Ultimately, you want to find something that compliments the instrument you’re recording and the desired sound you’re after. For example, if you have a singer who has a very nasally voice or if they tend to pronounce “s” sounds pretty hard, you’d want to find a mic that doesn’t accentuate those unpleasant sounds.
When buying a microphone, it’s important to note that there are many different styles of microphones. Typically, the most common ones are dynamic microphones and condenser mics. The difference between different mic styles has to do with how sound passes through them (but that’s a whole other big article).
In general,
- Condenser mics tend to be more sensitive and reveal a lot of the detail in a voice.
- They also require phantom power (so you need to make sure you have an interface that can provide that)
- Because of how sensitive they are, they aren’t always the best mic for recording lots of different instruments (especially loud ones like drums or guitars)
- Some great inexpensive mics to choose from: Rode NT1, Aston Origin, Apex 460
- Dynamic mics tend to be a little darker sounding and not as detailed.
- They do not require phantom power
- Tend to be more affordable
- Can often be used to record multiple instruments
- Recommended Dynamic mic: Shure SM7B
If your goal is to primarily record vocals, I’d recommend starting off with a condenser mic.
If your plan is to record live instruments, dynamic mics are typically the best way to go.
Looking for one mic that can do both really well? The Shure SM7B is a great choice!
6. Pop Filter
When recording vocals, there’s nothing worse than having a great take ruined by a loud burst of wind making its way into the mic. On words that start with “b”, “p” or “t”, it is very common for a fast burst of air from the singer’s breath to overload the microphone (these are called plosives). When this happens, it can become very distracting to listen to. The easiest way to prevent this is to use a pop filter.
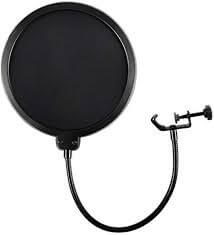
Pop filters are typically made of mesh or metal. They are designed to attenuate the energy of the air hitting the microphone. A secondary purpose they serve is preventing spit from hitting the mic.
They are typically very affordable and can save you from hours of retakes.
7. Acoustic Treatment
Part of capturing a clean, dry recording requires that you are in a room that isn’t full of reflective surfaces. The more reflective a room is, the greater the chances are of echoes and reverberations making their way into the recording. It is far better to record a signal as dry as possible since you can always add reverb during the mixing stage to make a sound seem livelier. That being said, if the reflections are captured in the original recording, it can be near impossible to remove them.
In addition, when you are mixing, it is always best to work in an environment that isn’t very reflective, since those reflections can get in your way of hearing things accurately.
This is where acoustic treatment comes into play.
Acoustic treatment can come in a variety of forms. Some treatment is designed to absorb sound and some is meant to disperse it. The truth is that you don’t need a fancy looking home recording studio with an abundance of acoustic treatment. For most people starting, the most important areas to take care of are where there are reflections. This can be achieved with minimal treatment.
For a great resource on which acoustic treatment you should get and where to place it in your room, check out Episode 22 of the Master Your Mix Podcast
There are plenty of affordable options available for adding acoustic treatment to your home recording studio. Companies like Auralex or Primacoustic make pre-made kits of panels that can easily be mounted on your walls to reduce reflections.
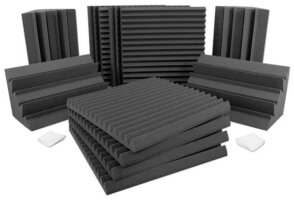
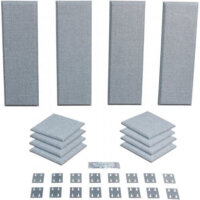
Alternatively, you can make your own acoustic panels for fairly cheap.
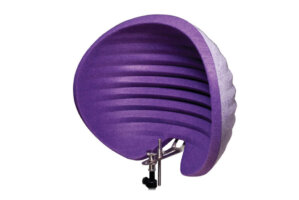
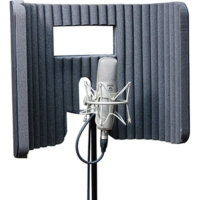
When recording vocals, in addition to having acoustic treatment on the walls of your room, it can be very beneficial to have a reflection filter (also frequently known as a portable vocal booth) located behind the microphone. These filters improve isolation and prevent excessive reflections from getting into the microphone. Some great examples of these are the Aston Halo and the Primacoustic VoxGuard.
Conclusion
So there you have it. Those are the 7 essential pieces of home recording studio equipment that you need to get started. It’s always best to start small and only add pieces as need be. Don’t fall into the trap of thinking that owning more gear or more expensive equipment will get you a better quality sound. It won’t. Quality will come from the development of your audio skills.
Once you have the essentials, put your focus on understanding how to make the most of the equipment you already have. Work on capturing cleaner recordings, mic techniques, and learning how to put all of the recorded tracks together and mix them to perfection.
Looking for more tips on how to get your mixes to sound big and polished?
Check out The Ultimate Mixing Blueprint: A free guide on how to use EQ and compression across a variety of instruments so that you can create great mixes quickly.
